
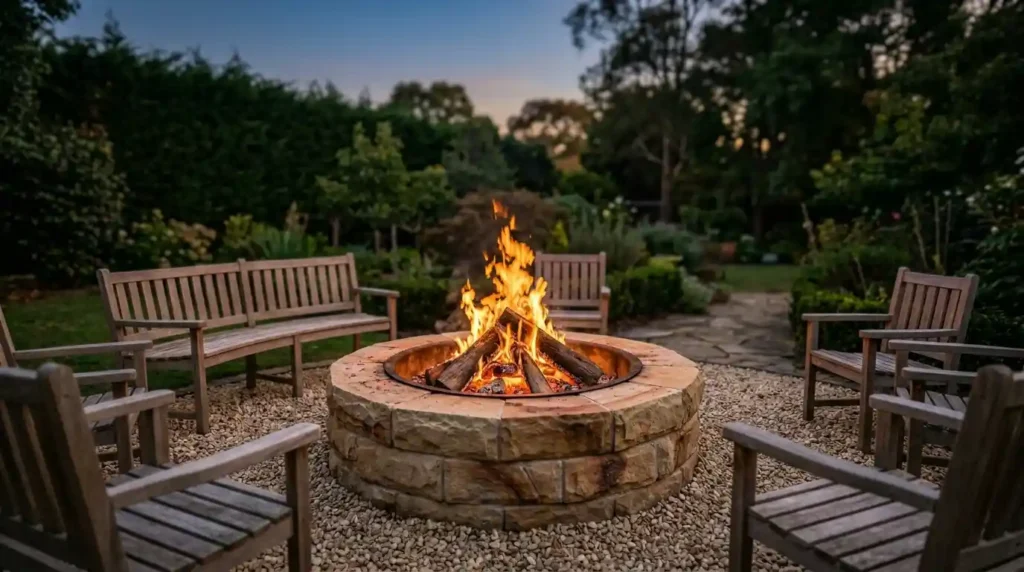
Most people get this wrong on the first go. Not because the build is hard a circular fire pit using concrete blocks is a Saturday morning job, 2 to 4 hours if the ground cooperates but because they skip the four decisions that happen before the shovel comes out. Site selection. Drainage. Material choice. Local fire codes. Nail those and the rest moves fast. Miss them and you end up with a cracked, waterlogged ring of blocks that doesn’t survive the first freeze-thaw cycle. I’ve watched both play out, including one backyard in the Peak District where a perfectly decent-looking raised fire pit turned into a standing puddle by November because nobody thought about clay soil and what it does to standing water. That’s the kind of thing this guide prevents.
What the Ground Under Your Feet Is Actually Saying Before You Dig Anything
Walk the space first. Properly walk it, not a glance from the back door. Flat level area sounds obvious until you start tamping gravel and realise one side of your excavation is sitting half an inch lower than the other and that half inch becomes a problem two block courses up. Stable ground without any incline is what you need. On sloped ground the whole structure shifts quietly over time and the block joints open up.
Clay soil is its own specific headache. Common in the UK, across Canada, large stretches of the American Midwest it holds water rather than passing it through, and a fire pit sitting on clay soil with no drainage solution becomes a mosquito breeding ground by midsummer, and a mold problem not long after. Mold prevention in a fire pit starts at ground level, not with a cover.
The drainage fix that actually works: dig a hole dead centre in your excavation, 12 inches diameter and 18 inches deep, fill it with large gravel. On clay or in high-precipitation areas, run a drainage trench 6 inches wide from the centre out to 10 feet, starting at 2-inch depth and graduating to 6 to 12 inches at the far end. Pack soakaway gravel into the base before any building starts. In the UK and Ireland, skipping drainage installation is — and I mean this bluntly — the single biggest reason garden fire pits fail before they’re two years old. That drainage trench does more structural work than the masonry adhesive holding the blocks together.
Wind direction is the other thing most guides skip entirely. Put the fire pit somewhere naturally sheltered a patio wall, an existing fence line, anything that breaks the prevailing wind because smoke control once the fire is burning is determined by where the pit sits, not by how it’s built. A fire pit that pushes smoke directly into the seating area every time the wind comes from the west stops being lit after the second time it ruins someone’s jacket.

Above-Ground, In-Ground, Wood or Gas — and Why It Changes Everything Downstream
Above-ground fire pit or in-ground fire pit. Wood-burning fire pit or gas fire pit. Permanent installation or portable fire pit. These aren’t aesthetic choices. They drive permit requirements, build complexity, material cost, and what breaks first. Decide before buying a single block.
Wood-burning is the one that actually feels like a fire. Radiant heat, combustion control that responds directly to the wood placement, open fire ambiance that no propane burner truly replicates. The honest trade-off is smoke in everyone’s face when the wind shifts, ash disposal after every session, and a dependency on properly seasoned hardwood. Never burn treated wood, plastic, rubber, or garden debris the Unified Fire Authority guidance is explicit and it applies whether you’re in Colorado or in Caernarfon. Prohibited burning materials aren’t a polite suggestion; burning the wrong things ruins the internal firebrick lining faster than anything else.
Gas fire pit propane or natural gas gives you push-button ignition, adjustable heat output, no ash removal, no smoke. A 20-pound propane tank runs $20 to $30 per refill and delivers 8 to 10 hours of burn time, which is reasonable for most people’s actual usage pattern. Natural gas needs a gas line installation at $15 to $50 per linear foot, licensed professional work only, permit required, no exceptions. Electronic ignition kits for gas fire pits cost $400 to $2,000 depending on whether you want a remote control ignition setup or a simple key valve the difference matters more than most buyers realize when it’s raining sideways and you’re trying to light a fire from the back door.
In-ground fire pit: lowest visual profile, better wind protection, a sunken seating area quality that genuinely integrates into landscape design. Rated advanced difficulty, takes over a day, and the drainage installation requirements are considerably more involved than above-ground. The raised fire pit blocks stacked above grade is the sensible beginner DIY project. Manageable in a weekend, reversible if the location turns out wrong, cheaper on materials by a meaningful margin.
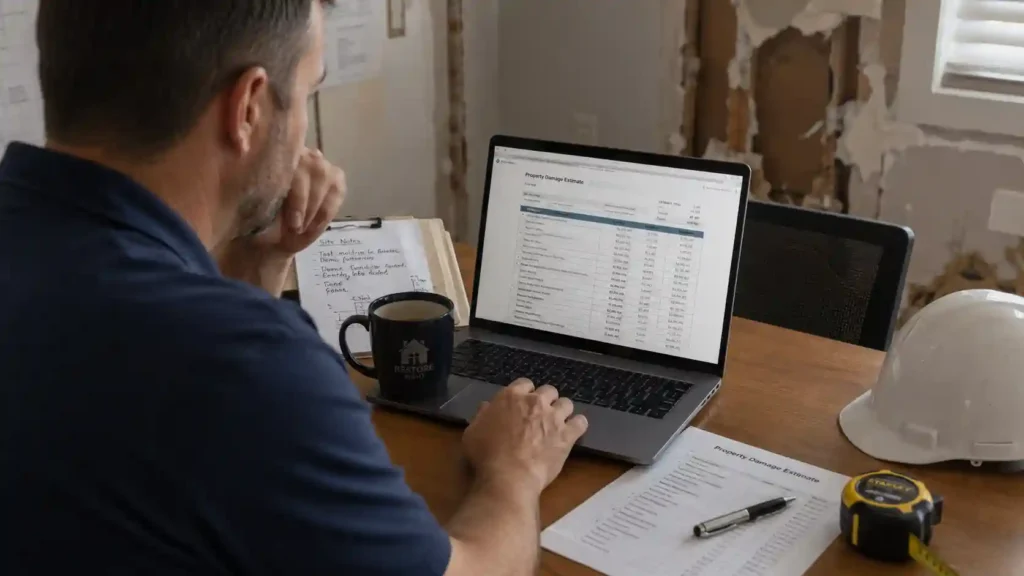
Cost reality: standard above-ground circular fire pit using concrete blocks, DIY material costs between $150 and $300. A fire pit kit runs approximately $625 plus sand and paver base. Professional installation averages $850. Stone fire pits range $350 to $3,000 depending on natural stone type. A brick fire pit with firebricks on the inner wall costs $300 to $2,200. In-ground fire pits start at $1,000 and run to $3,000, with luxury custom installations pushing past $5,000.

The Permits Section Nobody Reads Until They’ve Already Built the Thing
Fire pit regulations vary by municipality. Not by country, not broadly by region by the specific local authority covering your address. In the US the county fire marshal sets the requirements. In the UK your local council governs open fire rules, and in parts of Scotland and Wales those rules differ from English planning guidance in ways that catch people out. In Canada rules shift between provinces and again within city districts inside the same province. In Australia fire-danger seasons impose burn bans that override any permanent installation regardless of what you built or how much it cost.
The baselines that apply almost everywhere: minimum clearance of 10 to 15 feet from flammable structures, property lines, overhanging trees, low-hanging branches, dry grass, and heavy landscaping. Fuel area of the fire pit no more than 3 feet in diameter and 2 feet in fuel area height. HOA communities layer their own restrictions on top of that sometimes prohibiting fire pits outright, sometimes restricting fuel type to propane only. Check HOA documents before purchasing materials. That conversation is easier before you’ve spent $400 on sandstone coping stones.
Phone your local fire department or municipal office. Ten-minute call. Confirms permit requirements, approved materials, setback requirements, seasonal burn restrictions, and whether your plot falls under any specific local ordinance. Building without proper permits creates genuine problems at property sale. Some areas additionally require homeowner’s insurance disclosure when adding an outdoor fire feature verify with your insurance agent before the first fire goes in.
How to Build a Fire Pit: Marking, Digging, and Getting the Foundation Right First Time
Centre stake in the ground at your chosen spot. String tied to the stake, length equal to the radius of your intended fire ring for a standard 36-inch diameter fire pit that’s 18 inches from centre to perimeter. Walk the string around and use marking paint to spray the circle as you move. Clean perimeter, accurate cut line. For a rectangular fire pit lay your first course of concrete blocks on the ground temporarily and use those as the marking guide instead.
Dig 6 to 8 inches deep inside the perimeter, cutting 3 inches outside the marked line. All grass, sod, roots out completely. Shovel works fine in softer ground. Clay soil with a strong root system needs a mattock the shovel won’t move it efficiently and you’ll feel it in your shoulders the next morning. After material removal, pack the soil flat and level using a hand tamper. Compaction depth matters. Tamp too lightly and the gravel base shifts, and the block courses sitting on top shift with it, and by the third season you’ve got a lean that can’t be corrected without pulling the whole thing apart.
Fill with 5 to 6 inches of crushed gravel or paver base. Wet it down with a garden hose this is not optional, dry gravel doesn’t compact the same way then tamp again, keeping the surface even across the full circle. This gravel base is doing three jobs: handling drainage, distributing heat downward safely, and stopping the first block course from sinking unevenly in wet conditions. Some builders add 1 to 2 inches of sand on top of the compacted paver base before placing blocks. That extra sand layer makes fine levelling considerably easier on the first course and is worth the additional ten minutes.
First ring of stones or concrete blocks goes around the edge of the gravel circle. Circular fire pit needs trapezoidal blocks the geometry means they fit snug without gaps, which is what makes the circular form structurally stable. Rectangular blocks work for a square fire pit and take pattern variation well. Dry fit the entire first course before any construction adhesive goes on. Use a rubber mallet to seat each block and a level between every second or third placement. Any unevenness in course one multiplies by the time you reach course three.
Second course joints offset from the first that’s the stagger pattern that gives masonry its compressive strength. Fireproof cement or standard masonry adhesive between courses for a permanent installation. Dry-stacked fire pit skips the adhesive but gets classified as a temporary structure in most planning frameworks, which matters if you’re applying for permits. Steel fire ring insert goes inside after the first two courses are set. Lava rock or fire-safe gravel fill to the bottom edge of the ring heat distribution, drainage, and fire pit bowl base protection in one layer.
Three to four block courses high for most above-ground fire pits. Final course gets the coping stone or capstone use a material that matches or complements your surrounding patio materials. Building next to an existing paved area, cement the first block course directly onto the patio surface to stop shifting. Masonry adhesive on the final capstone layer, then 48 hours curing time before lighting anything. That curing period is not a suggestion adhesive that hasn’t fully cured fails under the thermal stress of the first fire and the blocks shift.
The Material Choices That Determine Whether It’s Standing in Five Years
Inner wall firebricks only. Heat-resistant bricks engineered for direct flame contact. Standard concrete blocks crack under thermal stress and in some cases explode this is documented, not theoretical. Do not use standard blocks on the inner wall regardless of what the cheaper kit specifies. Heat-resistant concrete works for custom poured fire pit bowls but requires a different build process. Outer wall has more flexibility: decorative brick pavers, natural stone, flagstone, and sandstone, and limestone, fieldstone chosen for weather resistance and aesthetics because they’re not seeing direct heat.
Base fill: lava rock for wood-burning, fire glass for gas. Fire glass creates a clean contemporary surface and works well with a propane burner kit. Lava rock handles the combustion control demands of open wood fire better and is the traditional material for that reason. Do not use standard decorative pebbles or random gravel in the base certain stone types overheat and fracture explosively, which is a specific risk inside an enclosed fire pit bowl where the debris has nowhere to go.
Stainless steel for the fire ring insert. Corrosion-resistant, structurally stable under sustained heat, contains combustion within the fuel area properly. Cast iron is a valid alternative but adds weight that becomes relevant if the pit ever needs any structural adjustment. Galvanized steel enclosures are used in prefab fire pit kits as the internal structural frame before the masonry veneer goes on this is the construction method in most mid-range fire pit kits. Spark screen sized specifically to your pit diameter, kept in place during active use.

What Actually Happens When the Fire Is Lit and Most People Stop Paying Attention
Garden hose, water bucket, or sand bucket in position before the fire starts, not fetched after it’s already burning. Fire extinguisher is backup, not primary fire management. Never lighter fluid, never gasoline, no flammable liquid fire starter under any circumstances. Fire starter block first, then tinder newspaper, dry straw, thin dry material then kindling of thin sticks or twigs, and firewood only once the tinder and kindling are well alight. Seasoned hardwood burns cleaner, fewer errant sparks, less ember scatter than unseasoned wood. That matters particularly on a dry summer evening.
Check the air quality forecast. Confirm green burn day status before lighting. Daily burn restrictions during drought conditions apply across most US states, across Australia during fire-danger season, and during designated periods in Canada the no-burn alert system exists for real reasons, not bureaucratic ones. On high-wind days, close supervision of children around the fire pit and pet supervision nearby become non-negotiable. Wind conditions move an ember from manageable to a serious problem in about thirty seconds.
Extinguishing: water, properly. Not banking the coals and walking away drenched with no embers remaining, ashes stirred with a poker to expose any heat still buried in the pile. Cool-to-touch is the standard. Ash removal after each use improves airflow for the next fire and reduces smoke on lighting. Periodic inspection of the fire ring for rust, the block courses for cracking, the mortar joints for shifting. A fitted cover when the pit is out of use keeps rain, snow, and debris out and meaningfully extends the lifespan of the whole structure across multiple seasons.
What Goes Around the Fire Pit Is What Actually Gets Used Every Evening
The fire pit is the focal point. The outdoor living space around it is what makes the build worthwhile month after month. A seating wall from the same retaining wall blocks or natural stone as the pit $4,400 to $15,800 depending on scale and materials turns the fire area into an outdoor room rather than a standalone feature. Weather-resistant seating in teak or aluminium holds up across UK winters without the annual ritual of dragging furniture into a garage. Rattan corner sofa sets with outdoor cushions work well in sheltered spots. String lights, LED ground lights, low-level lanterns landscape lighting is the thing that determines whether the space gets used after nine o’clock or not.
A paver border or decorative stone path from the main patio to the fire pit area integrates the fire feature into the broader garden design rather than leaving it sitting in the middle of the lawn looking like it arrived by mistake. Fire pit table setups that double as a coffee table during the day work particularly well in smaller UK gardens, Edinburgh terraced backyards, Toronto compact lots any situation where the space can’t absorb a dedicated fire feature and a separate furniture arrangement. Property value uplift from a well-built, permanently installed fire pit is real. Prospective buyers in the current market treat quality outdoor living space as a material feature, not a nice-to-have.
Conclusion
Knowing how to build a fire pit is the easy part. The harder part is building one that still looks deliberate three winters from now joints tight, base level, drainage working quietly underneath it the way good groundwork always does. Most builds that fail weren’t badly built. They were badly planned. Wrong ground, no drainage hole, blocks that can’t handle direct heat, a location that made sense in July and made everyone miserable by October. Get the ground right first. Match the material to the fuel type. Check the local fire codes before anything else. Do those three things honestly and the rest of the build the excavation, the block courses, the fire ring, the capstone follows a logic that’s hard to get wrong. The fire pit that lasts isn’t the most expensive one or the most elaborate one. It’s the one where somebody thought carefully before picking up a shovel.


1 thought on “How to Build a Fire Pit That Actually Lasts — Materials, Costs & Mistakes to Avoid”